Monday, February 28, 2011

Preparing for Pests 2011 : The first wave

Obviously it's early for this post, but it always surprises me how early insecty-buggy-pests show up on my plants.

We have a lot of wild mustard and garlic mustard around so it's never a wonder when I look out to see tens of pale little butterflies (moths, actually) flitting around the yard. It's also not a huge surprise when the cucumber beetles arrive and render my poor cucurbits pretty much sterile. What is surprising is when I wander around the side of the yard and find my currant bushes skeletonized by sawflies, or when I head out to check on my young tomato plants only to find them chewed to nothing by hornworms.

Whether they launch surprise massacres, or waves and waves of foreseen attacks, pests are definitely present yearly in my garden. Last year I lost a lot of plants to so this year I mean to prepare early. I'm going to outline what it is I plan to do for each of these little guys and their onslaught of destruction. Below are some of the critters that wreak havoc on the spring vegetable garden. The earliest of pests: The first wave, sort of.

Cabbage Loopers are usually the worst of my very early spring pests. The little moths dance around the yard and it never occurs to me in time that they're laying eggs for their pesky little worms. These little green worms pack a mean punch to any young brassica, including cabbage, broccoli and brussels sprouts. Since I intend to grow all three of these delicious plants this spring I will be using some sort of cover for these plants. The great thing about brassica is that they are true vegetables, meaning we eat the plant parts regardless of fertilization and not the fruits, so I can cover them completely and let them grow without worrying about giving access to pollinators. I'll be attempting to use Tulle instead of commercial row covers. I was originally going to make yellow underskirts for my bridesmaids last fall and when the time crunch came I abandoned the project. This wasn't before purchasing 80+ yards of yellow tulle at discounted prices though, so I'm happy to have a purpose for it in the garden this year.

Flea Beetles are pretty impossible to avoid in this area of the state. Even if you don't have a garden in southern Michigan, it's a safe bet that each and every dicotyledon is peppered with the tiny round holes that are the telltale sign of flea beetles. Until this year, they haven't bothered me much since I've been growing things primarily for my own use. This year however I'm going to attempt to grow for market and unfortunately that means I've got to attempt to do something about them. One thing I mean to try this year is planting radishes as a trap-crop. Supposedly if you plant radishes a few feet from your greens it will draw all of the flea beetles off of your greens and onto the radishes. I don't grow radishes for greens often, so if they make lace doilies out of their leaves I don't mind.

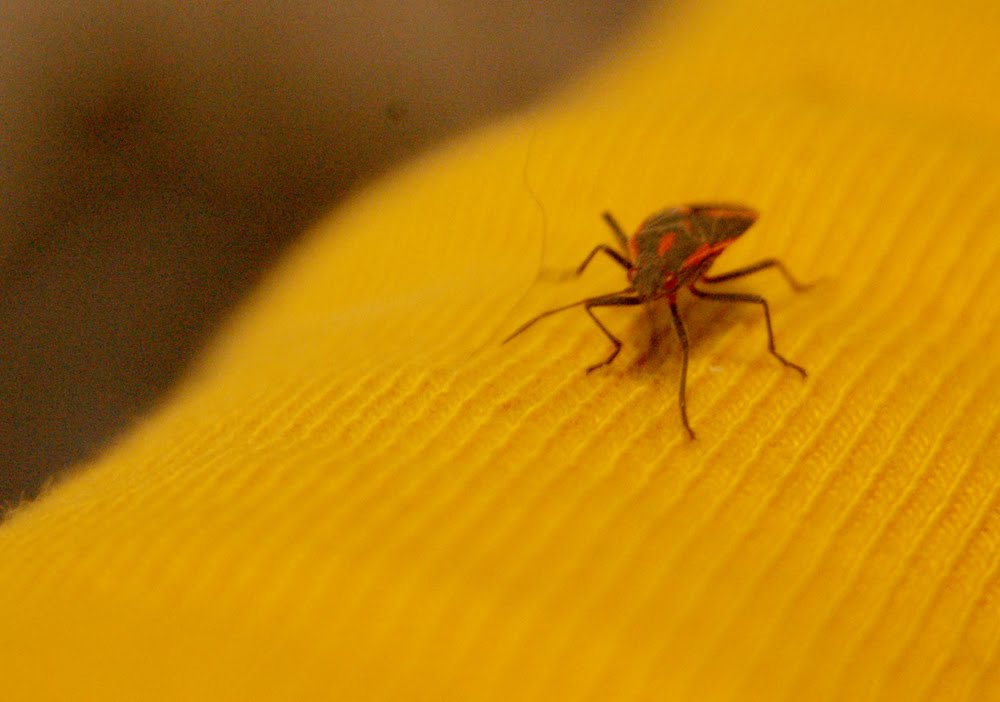
Radishes will also be put to work against the dreaded Cucumber Beetle. Supposedly they are driven off by the scent of mature radish blooms/seed pods. I have ordered "Rat Tailed" radishes specifically to use against these nasty little stripey/spotted dudes. I've read a lot of places that dispute the effectiveness of radishes against cuke beetle, but most of those places say they just planted them recently and nothing happened. My guess is that they didn't realize it's the mature plant that the cuke beetles dislike. In addition to radishes, I'll be employing the aid of tulle fabric over the tops of all of my cukes, squash and melons in early spring to deter the establishment of these nasty little buggers.


The Currant Sawfly is another obnoxious little jerk that has nearly undetectable eggs and goes from itty bitty problem to total plant sketetonization within a day or two. They're like the hungry little caterpillar, only imagine hundreds of them...
The best course of action for these guys is to keep an eye on them. Last year my currant bushes were the only thing on that side of the house worth checking on so there would be entire weeks where I wouldn't see them.
This year I will be over there because of the blackberries so I will be making checks every few days. As soon as these guys show up I will begin harvesting them for the poultry! Mwahaha...

One other early pest that I have yet to figure out plans for are the Spotted Winged Drosophila, which appeared for the first time last year and might just make me totally flippin crazy! These guys lay their eggs and their little maggots love to live inside the berries so you can only spot them while harvesting. EW. Ew. ew. Unfortunately they are a new little problem quickly becoming a big problem. They're a recent invasive species terrorizing berry farmers across the states, and they prey on the raspberries, blackberries and blueberries which means some hard times for Michigan's blueberry farms.

Any suggestions for the Drosophila?


To make a very long post shorter (I have go go attend to a dog with another bleeding paw. Ugh.) I will summarize the early-summer pests and approach them in a latest post: Tomato Hornworms will be hand-picked, and thank goodness we haven't had issues with Cutworms yet. Japanese Beetles will be flicked, squished and fed to the poultry (in fact most of the pesky creepy crawlies will be poultry fodder.)

I guess that's really my plan for now. Sometimes I think they're waging war on my garden, but like any war there are two sides to the conflict. They're just trying to get by, just like I am. Bugs, bugs, bugs...

Friday, February 25, 2011

Maple Syrup: Batch Two

Well, I've successfully finished my second batch of maple syrup. This time we began with roughly ten gallons of sap, and finished with almost five cups of syrup. Unfortunately I managed to trip into the stove and slop almost a cup of nearly-finished syrup onto the burner. Boo!

I honestly wasn't terribly upset, as I'm used to being clumsy when doing things like this, and so I finished with just over four cups of sap. I actually reprocessed the stuff from the other day to get it slightly thicker. It wasn't too thin to be used, but it was slightly thinner than I liked, so the extra from today's batch went to round out the first batch after reprocessing it.

I know we have another 3-4 gallons waiting up at Roheryn, and another warm up early next week so I should be able to get at least one more batch hopefully before the trees bud out!


Tuesday, February 22, 2011

Prepping the New Bed

The thaw last week provided some great sunny hours and, since I'm incapable of sitting still when the sun is out (or ever, now that I think about it) I took advantage of the fickle weather and started working on the new veggie bed.

This bed is going to be home to our tomatoes, greens, peppers and pretty much anything else I can afford to stick out back. It's the farthest from the house, so I'm going to have to net it with deer netting. I also have tentatively planned to use premier electronet around it if the local wildlife (or sheep) becomes a problem, since it will be easy and cheap to hook up so close to the electrified temporary sheep fences.

Last fall I came up with a great way to prep for new beds while experimenting with the raspberry patch. I have purchased an ancient troybilt tiller that works wonders on exposed earth. The areas that we're planting were previously planted for livestock so they are home to a dense network of dead grasses, however, and are impossible to till through. I discovered that by using my weed-whip, a featherlite weedeater, diagonally I can basically shred the thatch that covers the ground until nearly everything exposed is dirt and nearly-obliterated grass crowns (is crown the right term for a monocot?). The next step last fall was to till down several inches and then mulch with started leaf/grass mold until spring.

During the thaw last week I was able to get a large patch, roughly 8' x 25' cleared using the weed whip. After this I laid down a thick layer of composting manure and straw, both duck and sheep. Duck manure is very hot, but this stuff is already partially composted and as I don't expect to plant this bed until late May I figure it will have some more time to decompose. Gosh that photo at left is terrible! If you look closely you can see the eight foot wide strip of yellowish straw and manure I laid down over the stripped earth.

My final step this past week was to cover the manure with plain cardboard that I'd been squirreling away over the past year or so. Jeremy calls this "Cardboard Village" since when the wind ruffles it up a bit (if there's no snow) it stands up a little and looks like houses and streets. This is another terrible photo - Sorry folks! The idea with the cardboard is that when the big spring thaw comes it will soak and keep the composting manure moist and sheltered from direct elements, as well as absorb sunlight and trap heat under the cardboard. I was unsure if this was working last year, but then I discovered the colony of snakes living under my test patch and figured since they require warmish places to shelter at night they were a good indication that the cardboard was holding a bit of heat. Probably not much, but any bit counts. In the spring, I will lift and discard the cardboard, probably by using it as mulch between my rows, and I will proceed to finish prepping the bed by loosening the soil.

The one sticky spot is that I would really like to implement the french intensive double digging method with any new veggie beds this year. Of course, double digging through thatch and 50 years of crowded grass roots would be hellishly difficult and time consuming. The idea of double digging is to keep the biostructure of the soil intact, with deep microbes remaining in deep soil and shallow in shallow. I've decided that I'm going to compromise.

If you're unsure of what double digging is, there is a great series of videos on YouTube that explain the concept and show how to do it yourself.


After I remove the cardboard, I'll till the first 2-3 inches to break up the bulk of the grass roots. Then I plan to double dig my rows beneath that, to keep the microbe structure of the soil similar to what it was originally.

My hope for this bed is to expand it in sections as things are ready to plant out. I'll have to post updates in the future, obviously. It's difficult to decide on a fixed size for the overall bed, but I'm a terrible planner anyway. Hah.

Monday, February 21, 2011

The Maple Syrup Post


We Have Syrup!


After gathering the first large batch of maple sap, we had roughly 13 gallons of sap. It was amazing to walk through the woods, emptying gallon jugs of sap into our collection pails. Some of the trees had produced more than a gallon overnight and were starting to trickle out the tops. I couldn't wait to get home to start boiling! Unfortunately I was busy the rest of the day so it wasn't until early the next morning that I lit the fire in the firepit and started heating the sap.

The sun was shining and it was a comfortable 55º or so, and I found myself obsessing over the boil. I started by sitting on a log, and quickly found that this was not only uncomfortable, it also meant I was stuck in one spot and when the wind would shift and the smoke would sweep past me there was little I could do. It wasn't long before I came up with an idea to make myself more comfortable. I lined our yard cart with a cardboard box, dropped one of the long sides and brought a blanket and pillow and made myself a mobile nest! It was probably pretty funny to see, but I was super comfortable and cozy, and when the wind would shift I could just wheel myself to the other side of the fire.

After several hours I had added roughly six gallons of the total sap and decided this would be a fine first batch which theoretically would give us slightly more than two cups of finished syrup (at 2% sugar content). I skimmed the foam from the top of the sap and had to diligently watch for blowing debris since the wind was relentless, gusting around 30mph. I was so worried that a rogue pine needle would alter the taste of the finished product, so I was like a crazy person any time the wind picked up.

When the sun went down I let things cool and packed up the sap, now roughly 1.5 gallons, and refrigerated it in the house. I had hoped to add the other seven gallons to the mix the next day, but the snow hit and I had no choice but to hold off boiling the rest.

This morning, though, I was concerned the sap would pick up an off taste from being in the refrigerator so I decided to finish the batch in the house on the stove. It wasn't long after I began smelling the sweet maple scent throughout the house that I looked down and found a friend on my shoulder. A Box Elder Bug! How funny. I had to wonder if he was drawn out of hibernation by the smell of the maple sap since box elder trees are closely related to sugar maples... It's startling to find bugs this time of year, but it's also a welcome sight since they indicate spring's inevitable approach.


After bringing the boil to roughly 219.5º I quickly filtered and refiltered the finished product to eliminate sugar sand and impurities. I then poured the syrup into sterilized and warmed Le Parfait jars and that was that! What an adventure! Our finished total was roughly two and a quarter cups, and the taste?

Here are some geeky ratios to describe the taste of this stuff...

pole syrup : store bought maple syrup
as
store bought maple syrup : homemade maple syrup


In short? AMAZING.

Sunday, February 20, 2011

Enjoying the warmer weather...

The weather this past week was like a dream. It provided a much-needed respite from daily trudging through the snow, and I was able to get several things done in the yard and barn. I mucked the entire sheep stall and toted all of the manure and straw/hay bits down to the edge of what is going to be the newest and biggest vegetable bed this spring. We have no tractor, so everything was done by hand with yard carts. It was tons of work, but in the 50º sunshine it was quickly done and I loved every moment of it. I also mucked and toted the duck manure, and started prep-work on the new bed. I'll have to post more about the bed prep later. I'm trying a new technique of my own ridiculous devising and I have photos of a lot of it perfect for a pre-spring gardening post.

I also got to spend some time boiling the first of the maple sap. I set up a fantastic little nest to huddle in while waiting and watching and (not-always-so-) patiently tending the task at hand. When the wind picked up later I was constantly trying to keep pine needles from blowing into the sap. It was intense! I was constantly skimming them from the sap's surface or flicking them mid-air before they landed. How tedious! We were going to finish the first batch today, but the wet weather and the ice/storm on the horizon kept me from starting the fire since we'd only get a couple of hours before our primitive setup would drive us indoors anyway. I was defeated as soon as I saw the forecast. Boo.

Finally, yesterday, Jeremy and I headed off to the spinner's flock Fleece Fair in Chelsea, MI. The middle school gymnasium was packed with people and fiber, and I had to walk at least three times past everything to feel like I was seeing everything. When we left, I had four balls of fluff with me and a grin on my face. I've started spinning the top right ball already and aside from an occasional second cut it's very nicely processed and easy to spin. I'll have to post photos of the finished yarn asap...

Thursday, February 17, 2011

The Squeaky Wheels get the Oil... or the Killing Cone

I know the phrase "killing cone" is a vulgar one, but it's really a contraption that allows the slaughter of poultry to be considerably quicker and cleaner. It's a cone (think ice cream, but large and plastic) that holds the birds upside down with it's head poking out of the bottom and with their wings snugged to their sides allowing whoever is processing the birds to kill them quickly with one knife stroke. The cone then holds the body of the bird while it bleeds out, and keeps it still while it's nervous system acknowledges it's demise.

You may know that we have a handful of ducks that live here with us. They provide us with amusement and duck eggs, as well as lots of mess to clean up. Unfortunately, when we had our one egg hatch last year it ended up being a young drake and now we have more drakes than ducks. Anyone who knows poultry (or livestock period) knows that in the farmyard, having more males than females is a bad ratio.

A few days ago, our drakes started to fight. This is common this time of year, often being referred to as "spring rage" in poultry. They weren't too bad at first, a pulled feather here and there, but not more much. On Valentine's day I came home from tapping maple trees to find one of our drake's had what is called "Foamy Eye". Foamy eye can result from all sorts of things; it's a symptom of eye irritation. In this case, one of the other drakes had pecked his eye, damaging the lid. It wasn't long before I discovered another drake also had an eye injury. The remaining drake was the victorious gent who was lounging with the lady-ducks, while the two injured boys looked on (or tried to) helplessly. Obviously he has his method down, and the two injured drakes will likely go blind in the eyes that have been damaged. Success for the little jerk.

It's difficult to think through this situation rationally. We raised our ducks from the time they were a week-old, and the younger drake from the day he was born. While I never intended to slaughter them for meat, it has crossed my mind a number of times since we have too many males. Seeing as we really would like to have chickens (and thus, chicks) this spring I have to start thinking ahead. Our two now-injured drakes used to make sport of grabbing the poor duckling by the neck and trying to pull him into pieces... and they're the nice drakes! I can't imagine coming home to find the yard littered with chick-bits just because the drakes got into the chicken's pen. Ew.

The plan is that I eventually will be slaughtering our own chickens for meat, but as we'll be raising very specific birds for meat, I'll be adjusted to the idea and I won't have given them names or gotten attached or anything. This is not the case for the drakes. So I'm at a stand still right now.

The drakes' days are numbered. They're likely going to kill each other even if I try to intervene, and in all honesty I'd rather have dead ducks in the freezer than dead ducks in the yard. However, since we raised them from ducklings I can't seem to bring myself to slaughter them myself, and all of the processing plants are closed this time of year. I'm left with three drakes, stressing me out and penned up separately and miserably, two of which have eyes that are now beginning to scar over and will likely be half blind. I'm willing to cater to this silliness a little while longer, but I have my feelers out for someone willing to slaughter them. I can handle dressing the birds myself, just not the act of killing the little buggers.

Tuesday, February 15, 2011

First Sap


I figured I'd post a quick shot of the sap we collected yesterday. Obviously this is a very small amount but considering this is what was ready in the time it took for us to grab lunch, I'm pretty happy with it. It's a beautiful clear liquid, ever so slightly thicker than water, with a very pale warm tone to it. We collected roughly 1/3 gallon yesterday, and hope to collect at least 15 more gallons through the rest of the season.

An adventure in rigging gutters

With the thawing snow yesterday we quickly learned that our sheep barn is less than perfect. I knew at some point it had gutters, but those had fallen off years ago and were wedged down under some brush by the side of the barn, overgrown and snowed on. Unfortunately due to the lack of gutters, when the snow began melting there was a constant downpour along the overhang of the barn. This downpour, combined with the snow on the ground, made a slushy muddy mess of the entrance to the barn and all I could picture was muddied fleeces and hoof rot. I know, I know... perhaps I'm a bit paranoid.

Anyway, despite having a very sore back yesterday I knew I had to fix the gutters as quickly as possible before the growing mud puddle could reach the sheep's stall where they often lie in the straw. I went out in the morning, before even tapping the maples, and proceeded to free the old gutters from their would-be graves to give them purpose again. I began reattaching them to the barn, using screws instead of nails in case I ever needed to pull them down again.

It wasn't until I was attaching the final section of the gutters that I noticed it was still dripping into the mud puddle. To my horror I realized that the years of rest had left the gutters rusted and full of pin-prick holes! Ugh!

I attached the final gutter and trudged back to the house, defeated.

This morning, however, I was struck with a fantastic idea. I needed a way to cover the holes at least until things dry up and I can caulk them. Originally I had thought duck tape (duck brand, not duct) but I knew that because the gutters were already wet this would be a frustrating and impossible endeavor. Then I thought about getting a caulk designed for wet application like pool tiles. Even if I could overlook the terrible toxicity of this stuff, none of it sets up below 40º so there was no way it would work. Drat! It wasn't until I had vetoed at least three other ideas that it came to me.

Feed bags! Feed bags, on the shiny outer side, are heavily water resistant. If I nested them correctly, I could cut them into strips and line the gutters with them. Of course, I never thought this would really work...

Time will only tell how this holds up, and I'll have to see if I can find some used gutters on craigslist or something eventually, but this is certainly working for now! Hooray for improvisation!

Monday, February 14, 2011

Tappy Valentine's Day

Sorry folks, that was terrible!

Today is Valentine's day and my husband Jeremy and I spent the morning out at Roheryn Farms tapping their maple trees. This is our first year tapping maples, and I have to admit when we got out there it was pretty daunting. Their woods is full of maples, which is great. The problem was that there were all different types of maples. They have sugar maples, red maples, silver maples and even some box elder. This time of year, unless you really know what to look for, it's very easy to mistake one species for another. After some quick smart-phone research (this is where these silly contraptions really come in handy) I was able to identify the different trees by their bark texture.

The way to identify a tree in the maple family is to look for the opposite branches. Of course in a dense woods like at Roheryn, this is difficult because often one or the other opposite branch has snapped off as the tree has grown. There were very long minutes of standing in the cold wind staring straight up into 50 year old crowns until at last "Aha!" my eyes would focus in like a zoom lens on a small twig high above my head that would confirm the towering tree's family. Opposite branching means that the smallest branches, when growing, grow out of the same point on the supporting branch.


Next was identifying which type of maple we were looking at. We only tapped one red maple and, quickly realizing our mistake, removed the spiles and apologized to the poor tree. The thing about maple trees is that, while their bark is very different from species to species, there is no black and white. Red maples can have sugar-maple-like bark, and vice versa. The best way to identify the sugar maples that we found was to look for maples that have strips of bark that appeared loose. It's the kind of tree that if you leaned a firm hand against it while hiking, you might snap off some of the bark that was jutting out away from the tree. Red and Silver maples have bark that snugs closely to them, flush against the trunks. I wish this were easier to explain.

Anyway, we figured it out and after that tapping trees went much faster. Some of the trees are nearly three feet thick, and we found quickly that the sap rises in the big trees earlier than it does the smaller ones. The trees that were at least two feet thick all started dripping as soon as we drilled. Some of the narrower trees didn't seem to have sap risen yet at all, so Lauren from Roheryn is going to text me today to let me know if they're still not flowing. If they're still not flowing tomorrow I may move the spiles to the bigger trees. My guess is they'll rise this afternoon since it's supposed to be considerably sunnier today.

If you've been following our blog, you'll know that I've been attempting (and failing) to cut down on the plastic in my life. We have started changing over from plastic water storage to glass, just about as quickly as we can drink apple cider. This left us with lots of old, clean, water jugs made of plastic, and as I have a habit of reusing plastic rather than eliminating it, it should come as no surprise that I came up with a way to mount them to spiles to collect sap. Since Lauren and Heather are only able to check and empty the containers once a day, I needed something bigger than a mason jar to collect sap. This is our first year tapping so we're not ready to launch into metal buckets but we'll likely try to pick some up when we visit New Hampshire later this year... Supposedly in sap country out there, they're fairly easy to pick up used for a fraction of the cost for new.

You should have seen me when we tapped our first sugar maple that had sap that had already risen. It started spilling out of the drilled hole and I did a little dance and immediately swiped some of the sap off the tree with my finger, grinning feverishly. I'm surprised Jeremy didn't have me committed after that! I admit I'm pretty geeked about the whole thing. We have a whole load of wood, too soft to burn in the wood stove, standing at the ready for boiling down the sap next week.

Even if we only get a few gallons of sap, and thus a few ounces of syrup, this has been a really fun experience and it has been the perfect way to enjoy the first big melt. I hope in the future it will become the hobby that keeps me going through the last month or so of winter before the gardening season begins.


--
Have you ever tapped trees, maple or otherwise? What do you use to get you over the last hump of winter?


Sunday, February 13, 2011

The First Big Melt


Harrison has found a sunny spot to survey the house from the top of the stairs.


Well, Spring is here!


Psych.


Michigan loves to do this to us mid-winter. We'll be trudging along, perfectly miserable through the last several weeks of winter and Michigan, like a flare of hope spotted in the sky, gifts us a quick thaw to help us get through. As I write, it is a perfect 45º outside and the sun is making quick work of the snow-upon-snow-upon-snow that blankets the world.


The icicles hang heavily all along our house (lack of gutters will do that) and every once in a while we all -jump- out of our skin as a loud crash announces the demise of nature's latest icy architecture. It's nice to sit in a comfy chair on our heavily-windowed front porch and watch the birds courting each other as they flit about screeching something terrible. It's so nice, in fact, that I can nearly convince myself that this is it: The Big Melt. This is what I've been waiting for for months. Of course, despite what you may think and despite my hopeless romantic status, I am smarter than that. Give it another week and we'll be trudging through fresh snow, cursing the wind with lips chapped anew.


I plodded through the sloshy snow down to the gardens at the bottom of the yard by the windbreak to take a few photos this morning. Most of the cone flowers and sunflowers and various other bird-friendly plans have been picked to bits by the finches by now. I've been careful to keep the birds fed at the feeders since they've been so kind as to stick around through the winter so far. It's important this time of year to provide them with food if they're still in the area.


In addition to picking over the perennial beds, the birds have eaten nearly all of the wild rose hips from the orchard. It took me a few stops at multiple rose bushes before I could find an untouched cluster of rose hips. You can see the winter has taken it's toll on the roses as well. The hips are nearly freeze-dried, like rose hip raisins.


The one thing that these winter warm-ups do provide us with are some seriously stellar sunsets (yeah alliteration!) The sunsets have been fantastic the past three evenings, and I've been fortunate to watch them all from our west-facing front porch. It will be a bummer when Michigan decides to freeze over again, but at least we have this little glimpse of spring to know it really is on the way.


------


One final update in case you missed my edit on the January craft swap post: I have finally photographed the wonderful garden apron that my mother made for me. It has so many pockets, and even three loops for tools, and two slots for pencils! It's very durable and I'm sure it'll hold up to my crazy gardening adventures.

Thanks Mom!

Friday, February 11, 2011

Counting my Eggs

After a particularly verbose email (in which I tried to make myself sound pleasant, and not pleading), I have received the green light from our landlady to get chickens this spring. She sent me a very quick email while she was out of town and used the phrase "No Problem" which made my giddy farm-girl heart leap. Of course I love to count my eggs before they are hatched. I'm sure I have to get the O-Kay from our neighbors before really pursuing my latest poultry plot, and while we have a good relationship with them, I do know that they are concerned with the possibility of my farming endeavors becoming a smelly nuisance.

Being particularly disgusted by strong smells and not adverse to hard work, I don't think this will be a problem at all. Mucking the ducks and the sheep is a simple task and I keep up with it well enough to keep smells down. The only time the ducks get smelly at all is when it's spring and their winter waste has seeped into the ground, and even then you can't smell it from more than twenty feet away.

Anyway, if you've followed this blog at all, you've probably picked up on the fact that I love to plan things. Prior to my landlady's decision I had started hazily planning how I would set things up if I could have chickens. The moment I read her response, those hazy plans snapped into clarity and I knew exactly how I was going to build the coop. Months ago, while pulling off some old corrugated metal siding on the barn I discovered a small poultry door that was built into the original structure. It was this discovery that led me to daydream about chickens in the first place. If you look in my first sketch, the little black square indicates where the cute little poultry door is. Obviously my multiple-point perspective skills have waned since graduating from college. Haha.

My plans are here on the right. I am going to create a long, narrow run for the chickens to go into during the day. The run will have a door in the end, probably around six feet tall, and the poultry door will have a ramp and door (or perhaps a hinged ramp that doubles as a door?). I'll also have several perches and probably an external nesting box in the run. Inside the barn I will fix up that end of the barn (it's currently a ridiculously disorganized storage area) and build a similar run to keep out the predators. The barn has amazing ventilation so it's perfect for poultry! Then, in addition to all of this, I plan to have one or two lightweight tractors so that the chickens can graze around the property but snugly contained in their movable grazing quarters so they aren't a nuisance to the neighbors. That pretty much takes care of the housing plans. I do have a vague idea in the back of my head for rotating veggie beds to graze the chickens on either weed seedlings or the bugs living on mature plants (can we say cucumber beetles!? mwahaha.)

Now that the housing plans are fairly complete, I get to think about breeds! Oh geez. Michigan has some spectacular rare heritage breeders. I've already contacted a woman about Copper Marans, which produce the most amazing and beautiful dark, dark brown eggs. I'm such a sucker for pretty colored eggs. I'll probably get Marans and Ameraucanas (Araucanas bred specifically to be killing-gene free) since they produce such uniquely colored eggs.


Then again, I also discovered there is a local breeder of Blue-laced Red Wyandottes and after seeing photographs of these amazingly beautiful birds I can't help but want to have some in my flock! I have no idea what breeds I'll end up with. There are so many beautiful birds out there that I can't even begin to decide here.

There's even a breed called Buckeye that is the only recognized breed that developed by a woman. In addition to that, Buckeyes are known for being amazing mousers, and supposedly they can rival any seasoned feline.

So many choices... Hmm... All I know is that I'm going to get heritage breeds, and by restricting myself to heritage breeds I'm really not cutting down my options much at all... haha, back to planning I go!

Wednesday, February 9, 2011

A quick update on my Plastic Free February

I'm sorry I've been slacking on the coverage of Plastic Free February. I figured I'd do a super quick post to share some tips and facts I've learned in the past week of trying to live without plastic.

  • Nearly every restaurant will oblige you with plastic-free carryout if they can.
    This might mean getting your side-o-guacamole dumped on top of your burrito at Chipotle, but you can definitely still eat it! I also discovered with Chipotle that while I usually enjoy using a fork, if my alternative is plastic I can definitely eat anything from their menu using tortilla chips as a utensil.

  • We buy our water from the grocery store. I know this is totally taboo in the "natural living community" but our well water tastes like eggs and while it's been deemed potable, I cannot stand the slimy salty taste it has after it has gone through our softener. Our softener is turned down to the lowest setting possible, too. That said, when we buy water I always look at the plastic jugs we store it in and this little voice in my brain goes "Ewwwww..." but for some reason I never set my mind to finding a solution. I'd seen folks come in with huge glass 5-6 gallon jugs but for a 5'3" me those just aren't feasible without some sort of dispensing system, and all of those systems are not only over-the-top expensive, they're totally plastic as well.
    My solution came to me this morning while I was daydreaming about making elderberry wine this spring. Cider Jugs. Duh. Cider still comes in glass jugs in some places, and those glass jugs are a gallon, and would be easily refillable at the water station in the grocery store. I'm still trying to find a source for jugs with threaded caps rather than pop-off "snapple caps" as they call them, but I'm on the right track! Plastic be damned!

  • It is nearly impossible to buy art and craft supplies without plastic of some sort. Last night we made a run to the craft store and I picked up some new watercolor brushes. I bought the brushes with natural bristles and wooden handles, but they still had the little plastic tubes to protect the bristles from being mussed. Of course, having once worked in an art store I know that there are always brushes without these little plastic tubes (whether they were lost in transit, or pulled off by some obnoxious little kid) so I plucked the little plastic tubes off of my own brushes and snugged them carefully onto the heads of brushes that otherwise might have been overlooked by discerning customers due to their unprotected bristles. Tada! No plastic. Of course, I was dooming someone else to buying the plastic, but I was also protecting the bristles of the brushes that might otherwise have been discarded due to shelf-wear.

  • I have made a few quick goals for myself for February, other than the glass cider jugs. One is to switch to all glass containers for my cooking herbs and spices so that I can buy them in bulk from now on instead of buying little plastic shakers. The other goal is to eliminate all plastic in my daily hygiene. This means (dun dun dunnnn) making many of my own hygienic products. Just this morning, Chiot's Run posted a fantastic tutorial for how to make your own tooth powder, and I am strongly considering switching to it (though I'll flavor with peppermint or cinnamon rather than lemon) if I can find a way to keep my teeth nice and strong without the use of fluoride.

  • My final note is that at some point I plan to do another tutorial for upcycling plastics. I have now used plastic feed bags to make a boot tray, and my mother has found a way to turn the wooden boxes that clementines come in into seed starting trays by using the plastic mesh that comes on the box lid. I've got to find the time to photograph and document these so I can share them, but let me know if you have any other ideas!

Monday, February 7, 2011

Summer Foraging Aspirations to beat the Winter Doldrums

There is still more snow falling on south east Michigan today. After falling into a snowdrift that was higher than my waist yesterday (and floundering around like a fool for a good thirty seconds before freeing myself) I have officially decided that this is enough snow. It's thickly draping over everything, and it's just deep enough to make morning chores difficult. With the addition of new snow I'm positive I'm going to have to shovel paths to the wood pile, sheep barn and the duck coop. Don't get me wrong; I love snow. I love to look at it, play in it and even do chores in it as long as I'm not constantly straining myself. The problem with being a gardener in winter though is that no matter how much you love snow, when it comes to February you've always got the tickle of anticipation in the back of your head - When is it going to happen, the first green of spring?

In order to quell my antsy itchy gardening aspirations, I decided to use the internet to learn some more about the crazy things I'd like to try this season.

One of the biggest interests I have beyond my formal garden is foraging wild foods. When I was a child I used to forage plantain, sorrel, clover petals, violets and daylily buds. I was totally that little girl who would be playing in the yard with a friend and say "Dare me to eat this?" knowing full well that not only would it be safe to eat, it would taste good as well. My friends thought I was so cool (or so I thought.. heh.)

I'm being kind of roundabout, but really what I'm getting at is that I want to forage more this summer. Our yard is full of volunteer edibles: dandelions, purslane, common plantain, garlic mustard (drat!), violets, wild grape, nettles, wild rose... They're everywhere! While reading up on foragables, I decided to read up on recipes for them as well. Most of the edibles are pretty much fancy "salad accoutrements", best for munching fresh with a simple vinaigrette. While I love a good flavorful salad, I really would love to find other ways to enjoy foraged foods year round through preserving.

Somehow I've managed to come up with several new recipes I'd like to try this summer just by wandering aimlessly through foraged food websites.

  • How to make Violet Jam - This recipe will be perfect for the late spring violets that carpet pretty much everything here. I love the idea of making violet-something jam, maybe violet-blackberry? Not only are violets delicious (violet pastilles were a favorite of mine as a child) but they are used to make a fantastic cough syrup.


  • Making Wild Grape Jelly - I had no idea that wild fox grapes could be used like their cultivated European cousins. This really should've have occurred to me before now, but I guess I never really though about it. I often snacked on the little berries as a kid, but I never realized you could gather them and make jellies and wines out of them. A family friend has also mentioned they used to gather wild grapes to make communion wine, which I find absolutely fascinating.


  • Making Jelly Candy from the blog Coconut & Lime - This recipe is a dream come true for me. I have always loved jelly candies and upon finding this recipe I was immediately struck by it's adaptability. Instead of using raspberry extract you could pretty much use anything. My plan is to make violet jellies, substituting the water and extract in this recipe with a boiled violet syrup similar to that made while making violet jam, above.


  • Flower Jelly - This final recipe is what drove home the adaptability of all things jelly and jam. To be able to take the sweet musky nectary flavor of fresh clover and capture it in a jelly for morning tea seems like it's too good to be true. Of course, it might not taste the way I imagine at all. It could taste absolutely dreadful, but I'm willing to give it a shot!


--
So does anyone else out there forage for food? What do you forage and do you preserve it?
Is anyone else out there as excited about a recipe for jelly candies??

Friday, February 4, 2011

January's Mother-Daughter Craft Swap

This was my first month participating in a craft swap with my mother. She and my father moved to New Hampshire last summer and it's been very different not having her around for spur of the moment runs to the farmers' market or hardware store. Several weeks ago I had this fantastic idea to convince her to participate in a craft swap with me. She and I both enjoy making things with our hands, and in her new house she has a great set up for a sewing or crafting room.


At the end of the month, at least until the spring madness begins, she and I are going to send each other something we have crafted. There aren't really any guidelines apart from my aim to use this as an excuse to learn how to do new things.

My mother's first craft for me, which arrived a few days before I even sent mine out, is a fantastic gardening apron. I kind of knew this one was coming, actually. She had heard me rant about the absence of really awesome gardening aprons for sale, and so together we picked out a pattern and she went from there. The fabric is beautiful and sturdy in a geometric design of browns and black, with a backdrop of tan.

I'll have to take a photo of myself in the apron some time when the house is a little warmer since I've got more layers of clothing on than I care to count right now.

For my craft this month I decided to learn to use some of the tools we received for our wedding and some of those that I received for Christmas as well. I knew I wanted to make something practical, decorative and I wanted to use our new dremel stylus, which proved to be a really fun little tool! I read up on bird houses and what dimensions encourage which birds and decided to make a wren house for my mother. We've always loved wrens, and they've been a real constant in my life since my grandmother had a fantastic little wren bottle hanging on her garage when I was a little kid. We would always sit on the porch and listen to the wrens singing out their little hearts. It remains one of my favorite memories.

I decided to add a Celtic knot around the opening and originally thought I might just paint it on, but I then decided I didn't want to use any paint; I wanted to use the dremel! What a crazy aspiration. After just a few little tests I dove right in, and while using a dremel on cedar is not necessarily the easiest first project (rough cedar flakes and chips very easily) I think I did pretty well!

My biggest regret is that I kind of lazily used the jig saw rather than learning how to use my new circular saw for the straight cuts. The Jig saw is old, wobbly and makes for some pretty wonky edges if you're not terribly skilled (ie Me).

My edges ended up much less clean than I had hoped, but the bird house is still functional and from a glance looks pretty well made.

All in all, this was a perfect way to begin our monthly craft swaps. I have tentative plans for at least two other crafts ahead of me, both of which push me to learn new skills. I'm now feeling more confident when working with wood, and I can't wait to do something else using the dremel stylus!