When I was in college I dyed wool all the time. Wool yarn, wool roving, wool fleece, wool fabric... I used it for weavings and knitting, and I even sold it on ebay for a while. I had access to the dye lab at the university I was attending and it was a gorgeous facility complete with stoves and ventilation. My college roommate can attest to this, as she was very irritated by the drying skeins of yarn in my closet and the overall permeating wet-sheep-smell. Bwahaha.
Wool was the first fiber I dyed, apart from the tedious cotton/rayon dye swatches I did with my dye class. Because it was my fiber of choice even before joining the textiles program, and because I'm a stubborn ox, I clung to it religiously and learned all I could about dying wool with acid dyes as well as a few natural dyes. Basically dye+acid+heat=colored wool... Aren't protein fibers cool?
So years later I decided to play with cellulose fibers (after graduating and without access to a dye lab) and discovered the process was far more time intensive than dyeing wool. Each time a cellulose fiber (made from plants such as cotton, linen, hemp, etc) is dyed, it must first be prepared using a mordant or fixative. Then after this chemical is applied it is ready to be exposed to the dye molecules. It's like prepping a petri dish, almost. You have to create the perfect environment for the dye molecules to saturate and fix to the fibers. I totally understood it, but I found the process tedious and the results uninspiring.
This spring, however, I began to notice other bloggers discussing natural dyeing, using various plants from their yards... The idea of using natural dyes wasn't new for me, but the idea of using weeds and invasive plants to create color on fabric was instantly inspiring.
The thing with dyeing cellulose fibers with natural dyes is that each natural dye source is different. Some plants that are high in tannin, such as oak galls, sumac and walnut hulls, will fix to a cellulose fiber easily and fast. Others, such as certain leaves producing golds and greens dye well on cellulose that has been treated with a mordant, or fixative (usually alum, but sometimes iron or other metals). Still other dyes, such as berry juices and many flower-based solutions, must be applied to a cellulose fiber that has been tannin-treated as well as mordanted... and some dyers even swear by treating with tannin a second time after the mordant.
When I was younger and in college I found myself tantalized by the quick and vibrant colors of acid dyes on wool, but now that I am older I am able to see the beauty in the lengthy process and ecological soundness of dyeing naturally.
This morning, I found myself in an almost meditative calm while preparing the cloth for the tannin bath that I'd made out of sumac leaves. The cloth has to be soaked in water to allow for even tannin uptake before it is immersed. The pot of sumac leaves was boiled for two hours and then allowed to sit for three days simply because I didn't have time to fuss with it. I feel like dyeing protein fibers with synthetic dyes is akin to baking - you have a very specific set of directions and as long as you are careful you can produce quick and even results that remain predictable.
With natural dyeing you are bound not by "directions", but by concepts... You should never expect a specific result; you simply hope and observe.
Something as simple as an increase of iron in your tap water can change the colors, and something as complex as the sun exposure that a plant had access to over the span of an entire growing season can affect the colors as well as the light-fastness.
You are at the disposal of the elements - a sort of terroir within fiber and cloth. As with all things inevitable, it's best to just relax and go with the flow, embracing the results with wonder and awe, and know that what you see in your finished cloth is a complex compound of so many incomprehensible factors that it is truly a glimpse of chaos. Float, as a leaf, down the river.
(photos coming soon... having some technical difficulties...)
Showing posts with label projects. Show all posts
Showing posts with label projects. Show all posts
Sunday, June 8, 2014


Sunday, October 6, 2013
Being an Accidental Orchardist
When we moved to this house (four years ago?) I had no idea how involved I would get with the property. Sure, I saw there was potential for farming. I saw the run-down barn and the creepy gnarled apple tree silhouettes "way out" in the old orchard.

Now I feel as though I am not only living in this beautiful little stone cottage; I am living on the land as well. From the sheep, ducks and chickens ranging, to the haphazard rotational grazing of the horses... from the miserably crowded melons in the glasshouse, to the rare strawberry breeds fighting for existence in their beds... I am part of the little bit of land that surrounds this place. I've set down some serious roots. (and doing so in a rented home is kind of nervewracking if you let yourself think about it too much!)

This home has come with lots of responsibilities and lots of work to keep up on, and it wasn't until last year that I really realized the potential for the land surrounding our cottage. Of course, last year was a miserable year for apples, and we didn't get a single one (though I did manage to get one single lonely pear, which might have cried while eating.) This year has been intensely bountiful for the apple trees and I am finally able to see just how stressed a beautiful orchard can get.
On windy days you can hear cracks coming from the orchards where branches are breaking free, tumbling dramatically to the ground and scattering apples in their wake. In this area of Michigan, apple trees are experiencing a bumper crop this year. Even the orchards with trees that have been well tended and have had fruit thinned have had to be drastically pruned to be saved.
The trees in our antique orchard are old and diseased, though not so horribly as to make their fruit inedible. This fall has really showed me that I need to step it up with these trees to keep them healthy. In fact, I need to step it up with the entire orchard. It's no coincidence that the trees where the sheep have grazed for the past few years are the healthiest in the orchard.
So I have spent the past few weeks reading and researching antique orchard restoration. This winter our trees will get severely pruned and I hope to attend a grafting class (or two) so that in the spring I can start replacing some of the dead trees. I know my new, young trees will have to grow up in an orchard with established disease and pests, but this is where I live and I intend to nurse them carefully into adolescence.

I didn't intend to become an orchardist when I moved in here, but now I think that I can't go back to seeing trees in need, seeing trees heavy with unharvested bounty... and not doing anything about it.
This is where my Accidental Orchardist idea started to emerge from my imagination (I think of my imagination as being a sort of disorganized, overstuffed filing cabinet... this idea definitely came from the "harebrained" folder).
Want to read more about my adventures as an Accidental Orchardist? Check this out here!
This home has come with lots of responsibilities and lots of work to keep up on, and it wasn't until last year that I really realized the potential for the land surrounding our cottage. Of course, last year was a miserable year for apples, and we didn't get a single one (though I did manage to get one single lonely pear, which might have cried while eating.) This year has been intensely bountiful for the apple trees and I am finally able to see just how stressed a beautiful orchard can get.
On windy days you can hear cracks coming from the orchards where branches are breaking free, tumbling dramatically to the ground and scattering apples in their wake. In this area of Michigan, apple trees are experiencing a bumper crop this year. Even the orchards with trees that have been well tended and have had fruit thinned have had to be drastically pruned to be saved.
The trees in our antique orchard are old and diseased, though not so horribly as to make their fruit inedible. This fall has really showed me that I need to step it up with these trees to keep them healthy. In fact, I need to step it up with the entire orchard. It's no coincidence that the trees where the sheep have grazed for the past few years are the healthiest in the orchard.
So I have spent the past few weeks reading and researching antique orchard restoration. This winter our trees will get severely pruned and I hope to attend a grafting class (or two) so that in the spring I can start replacing some of the dead trees. I know my new, young trees will have to grow up in an orchard with established disease and pests, but this is where I live and I intend to nurse them carefully into adolescence.
I didn't intend to become an orchardist when I moved in here, but now I think that I can't go back to seeing trees in need, seeing trees heavy with unharvested bounty... and not doing anything about it.
This is where my Accidental Orchardist idea started to emerge from my imagination (I think of my imagination as being a sort of disorganized, overstuffed filing cabinet... this idea definitely came from the "harebrained" folder).
Want to read more about my adventures as an Accidental Orchardist? Check this out here!
Saturday, March 2, 2013
Sick of Winter? Get Planning!
Are you as sick of winter as I am? I'm ready to burst!

So I've begun to plan garden projects for the year. In the past, I have had a habit of waiting until it warms up to get started on gardening, but this year I am hard at work planning and starting projects that I can do before the thaw!
So far, the things I've been working on include:
- small deck to set potted plants
- adding real windows to the framed plastic greenhouse I built last year
- adding a second tier of wood to my shallow raised beds
- plastic barrel planters for large plants like trees/brambles
- new strawberry beds out back for experimental rare strawberry varieties
- kitchen counter refinishing
- kitchen cupboard rebuild
Friday, March 2, 2012
On Melon Houses and planting new fruit varieties
If you've read my blog much at all, I'm sure you've picked up on the fact that I have a huge sweet tooth. When you combine that with gardening you end up in all sorts of trouble.
I LOVE to grow fruit, and this year I have decided to pull out all of the stops. I'll be planting new varieties of strawberries, raspberries, blackberries, currants and gooseberries - new to me, that is. Nearly every variety that I'm adding to my garden this year is from before the 1950's. The few exceptions include a modern white currant cultivar that I bought to compare to several antique cultivars that I've ordered, and of course Mara Des Bois strawberries, which I am in love with despite their modern origins. I'll post more on the berry additions later.
For now, take a look at what I've been designing and planning over the past few weeks!

It may not look like much, especially in my chicken scratchy handwriting and sketching, but this is hopefully going to be my adaptation of the British Victorian melon house. The whole thing will be covered with plastic, like a green house, but suspended midway (angled around approximately 2' above the soil) will be a cattle panel (heavy duty welded wire grid). The idea is that I will plant a row of melons at the back of the house (the small end). The vines will grow up the back of the house and onto the cattle panel where they will continue to sprawl outwards across the gaps in the panel. When they finally fruit, the fruit will hang down and I will tie it with simple cotton netting to hold it in place.
This set up will allow for air flow to help prevent mildew, cover to provide early heat for the plants and to prevent cucumber beetles from wreaking havoc on the poor flowers, and control of pollination. My plan is to hand pollinate all of the melons myself (Ooh, I'd love to use an authentic rabbit-tail pollinator! How cool!)
The other thing this set up will allow me to do is grow strawberries beneath the melons. June bearing strawberries tend to reach their peak in (duh) June, which is long before the melons would reach across to the front of the trellis. While the melons are making their first meager inches up to the trellis, the strawberries will be fruitful, planted in a row along the front of the bed. I'll also be hand pollinating these strawberries, which means I'll be able to play around with breeding a bit if I really get the drive. In between the strawberries and the melon plants will be some cutting greens, spinach and tom thumb buttercrunch lettuce.

I LOVE to grow fruit, and this year I have decided to pull out all of the stops. I'll be planting new varieties of strawberries, raspberries, blackberries, currants and gooseberries - new to me, that is. Nearly every variety that I'm adding to my garden this year is from before the 1950's. The few exceptions include a modern white currant cultivar that I bought to compare to several antique cultivars that I've ordered, and of course Mara Des Bois strawberries, which I am in love with despite their modern origins. I'll post more on the berry additions later.
For now, take a look at what I've been designing and planning over the past few weeks!
It may not look like much, especially in my chicken scratchy handwriting and sketching, but this is hopefully going to be my adaptation of the British Victorian melon house. The whole thing will be covered with plastic, like a green house, but suspended midway (angled around approximately 2' above the soil) will be a cattle panel (heavy duty welded wire grid). The idea is that I will plant a row of melons at the back of the house (the small end). The vines will grow up the back of the house and onto the cattle panel where they will continue to sprawl outwards across the gaps in the panel. When they finally fruit, the fruit will hang down and I will tie it with simple cotton netting to hold it in place.
This set up will allow for air flow to help prevent mildew, cover to provide early heat for the plants and to prevent cucumber beetles from wreaking havoc on the poor flowers, and control of pollination. My plan is to hand pollinate all of the melons myself (Ooh, I'd love to use an authentic rabbit-tail pollinator! How cool!)
The other thing this set up will allow me to do is grow strawberries beneath the melons. June bearing strawberries tend to reach their peak in (duh) June, which is long before the melons would reach across to the front of the trellis. While the melons are making their first meager inches up to the trellis, the strawberries will be fruitful, planted in a row along the front of the bed. I'll also be hand pollinating these strawberries, which means I'll be able to play around with breeding a bit if I really get the drive. In between the strawberries and the melon plants will be some cutting greens, spinach and tom thumb buttercrunch lettuce.
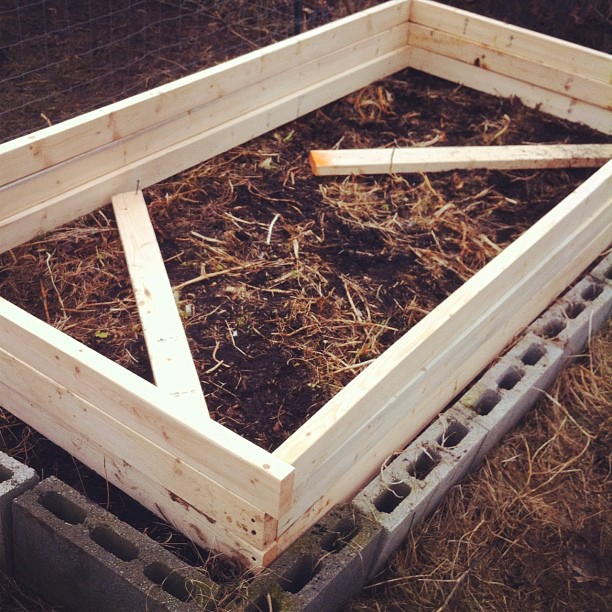
Also, a slight miscalculation lead me to build these houses 6" shorter than the length of the raised beds. I intend to plant snap peas in a single row along the north side of each bed in this space to help fix a bit of nitrogen and to add some diversity. If cucumber beetles become a real nuisance, I'll tear out the peas and put some rattail radishes in instead.
No inch unplanted, that's my motto!
So in a fit of intense mania this morning, I began to build my melon houses. Heavy rains and storms were forecasted but I managed to get all three beds ready for the installation of the cattle panels. Once those are in place, I'll attach the final beams, some additional supports, and cover them in tensed 4mm plastic! I've never been a fan of using plastic in the garden, but glass is just not feasible at this point in my life :) I'm sure you understand...
So, this is what I've been madly researching, designing and executing lately.
Are you planning anything exciting in your gardens this March?
Monday, January 30, 2012
On Tomatoes and Planning to do Nothing
You know.. I was thinking the other day. Every year, I have some volunteer tomato plants pop up here and there, and I rarely deter them from doing so. Every year I've been pleasantly surprised by the tasty results of said volunteers... and so this year...
I think I'm going to lay off the tomato planting.
At the end of 2011 I gave up on trying to keep up with the ripe tomatoes. I had planned poorly, staked wimpily and decided pretty much that the slugs could have the tomato plants. There were plenty of heirloom tomatoes out there, rotting on the ground. Thus, the tomato kingdom fell prey to various nasties (though I was incredibly surprised to only find two hornworms the entire season!)
This winter, I've been reading up on winter sowing as well as do-nothing farming, as conceived by Masanobu Fukuoka. I've posted about this before (though I can't find the post to link to it) and I'm thinking this year I'm going to put my faith in the seeds of last year's laziness. :) I was late planting my tomatoes last year and because of that and the terrible lack of fruit-setting heat, I got very few tomatoes before the slugs were strong enough to chase me out of the garden with their slimy sluginess. Ew. Because of all of this, I'm feeling a little pre-defeated... I don't want to deal with it again. Not like last year.
So. Theoretically if I let the tomatoes do their own thing this year I should get fruit similar to the open-pollinated and heirloom varieties I planted last year, right? On vines that sprout when they think it's best to sprout, grow straight from the ground and never know the restricting walls of a cellpack or a seeding tray... right?
If it doesn't work... well, I'll see that early enough that I can probably purchase some more mature plants and catch up more conventionally. I just can't help but feel my anxiety levels begin to creep up as soon as I open the seed catalogues to the entire chapter of tomato varieties that they offer. Hundreds of varieties, people. It's overwhelming. I don't want to plan tomato patches. I want to plan neat little rows of things like lettuce and beets... and long-term projects like the blackberry and gooseberry patches.
So that's my plan. I'll amend the soil a bit with some composted manure in the spring, and I'll till the pathways, weed and thin seedlings... but apart from that, Mr. Tomato, You are on your own for 2012.
xoxo
I think I'm going to lay off the tomato planting.
At the end of 2011 I gave up on trying to keep up with the ripe tomatoes. I had planned poorly, staked wimpily and decided pretty much that the slugs could have the tomato plants. There were plenty of heirloom tomatoes out there, rotting on the ground. Thus, the tomato kingdom fell prey to various nasties (though I was incredibly surprised to only find two hornworms the entire season!)
This winter, I've been reading up on winter sowing as well as do-nothing farming, as conceived by Masanobu Fukuoka. I've posted about this before (though I can't find the post to link to it) and I'm thinking this year I'm going to put my faith in the seeds of last year's laziness. :) I was late planting my tomatoes last year and because of that and the terrible lack of fruit-setting heat, I got very few tomatoes before the slugs were strong enough to chase me out of the garden with their slimy sluginess. Ew. Because of all of this, I'm feeling a little pre-defeated... I don't want to deal with it again. Not like last year.
So. Theoretically if I let the tomatoes do their own thing this year I should get fruit similar to the open-pollinated and heirloom varieties I planted last year, right? On vines that sprout when they think it's best to sprout, grow straight from the ground and never know the restricting walls of a cellpack or a seeding tray... right?
If it doesn't work... well, I'll see that early enough that I can probably purchase some more mature plants and catch up more conventionally. I just can't help but feel my anxiety levels begin to creep up as soon as I open the seed catalogues to the entire chapter of tomato varieties that they offer. Hundreds of varieties, people. It's overwhelming. I don't want to plan tomato patches. I want to plan neat little rows of things like lettuce and beets... and long-term projects like the blackberry and gooseberry patches.
So that's my plan. I'll amend the soil a bit with some composted manure in the spring, and I'll till the pathways, weed and thin seedlings... but apart from that, Mr. Tomato, You are on your own for 2012.
xoxo
Sunday, January 15, 2012
Tanglewood Bakery: First Market Recap

The overall aesthetic of the table was a huge success. We got some fabulous compliments, many people remarking on how they loved the set up and that they'd never seen such beautiful baked goods. I can't tell you how nice it was to hear that, especially after so much last-minute work!
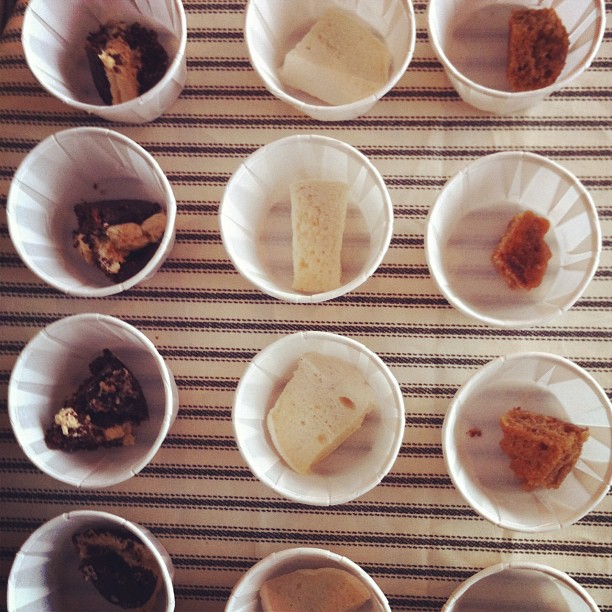
We had TONS of samples for people, and we even had two people stop by, obviously disinterested, shove a sample in their mouths and after walking a few steps, stop in their tracks, spin on their heels and rush back to buy something... A look of desperate sweet-tooth-dom on their faces. I can't tell you how good that made me feel. I've had that moment at a market, and I love that I can give it to others. Nomnomnom.

The bundt cakes didn't sell much, but we didn't have any samples out and I'm confident they would've sold more if they'd either been available to sample or topped with a more visible frosting (people love frosting... I learned that one quick).

The biggest seller was definitely whoopie pies. I'm a little bummed I didn't get my adorable "Gobby Hand Cake" labels on them, but they sold well all the same.

Another item that received very high praise was the dark chocolate shortbread with pink peppercorn and fleur de sel. Chocolate lovers definitely enjoyed this one, and I got tons of compliments on the presentation. One particularly interesting individual told me that they tasted like pizza, fruit cake and Dessert, and went on to say Dessert differed from the usual usage of the word because he didn't just mean dessert, like sweets. He meant Dessert in the sense that it comes after a very good meal and intermingles with the flavors from that meal to create a perfect finish. It was both the most unique and inspiring compliment I received all day! He had some really great things to say about all of the samples, and really taught me a thing or two about my own prejudices against first impressions... I kinda hope he comes back next time!

One thing that people were drawn to more than I expected were the fig caramel and chocolate tarts. I really just made these for myself since I'm a huge fan of figs, but they were received well and with open arms and mouths... :)
So... I can't begin to explain how exhausted I am right now. I'll be at the MIX marketplace again on the 28th. For now, in the slow season, I'll stick to every other week so I can continue to build new recipes on the off weeks. Yesterday morning I was convinced that I'd be burned out and never want to bake again, and this morning I woke up inspired to balance new recipes and learn new techniques, ASAP!
Operation Market Debut: Success!
Tuesday, January 10, 2012
Prepping for Market: The Display
It seems like 2012 got here a lot faster than anticipated. I feel ready. Right?
This Saturday Tanglewood Bakery will be setting up at the first market of 2012. It's called MIX marketplace and it's a new indoor farmer's market in Ypsilanti, MI. They had great response from the holiday crowd, so hopefully people will be equally thrilled to visit weekly now that the holidays have passed us.

I've been doing lots of things, both necessary and unnecessary, to prep for the market. First of all, I want a super fleshed out aesthetic for my booth. I want everything to look like it belongs there. To do this, I've been making my own displays (yay basic carpentry!) and I've chosen to stick with my ever-favorite teal, oatmeal and salmon color-scheme. I've been making list upon list of things to do, places to go, things to prep, things to stage and things to bake. It should be fun! (right?)

Here is a quick photo of the cupcake case I made yesterday, in it's salmon and teal glory. I have such a soft spot for victorian kitsch it's ridiculous. I can't wait to photograph the whole booth to show you, when it's actually set up!
So now that I have the bulk of my booth display complete, it's time to get into the kitchen! This is the first time I've prepped for market, so I'm sure I'll be an insane whirlwind of madness, despair and mania. Bwahaha. Wish me luck!
This Saturday Tanglewood Bakery will be setting up at the first market of 2012. It's called MIX marketplace and it's a new indoor farmer's market in Ypsilanti, MI. They had great response from the holiday crowd, so hopefully people will be equally thrilled to visit weekly now that the holidays have passed us.

I've been doing lots of things, both necessary and unnecessary, to prep for the market. First of all, I want a super fleshed out aesthetic for my booth. I want everything to look like it belongs there. To do this, I've been making my own displays (yay basic carpentry!) and I've chosen to stick with my ever-favorite teal, oatmeal and salmon color-scheme. I've been making list upon list of things to do, places to go, things to prep, things to stage and things to bake. It should be fun! (right?)

Here is a quick photo of the cupcake case I made yesterday, in it's salmon and teal glory. I have such a soft spot for victorian kitsch it's ridiculous. I can't wait to photograph the whole booth to show you, when it's actually set up!
So now that I have the bulk of my booth display complete, it's time to get into the kitchen! This is the first time I've prepped for market, so I'm sure I'll be an insane whirlwind of madness, despair and mania. Bwahaha. Wish me luck!
Thursday, June 2, 2011
New Additions
What is the size of a mouse and chirps like a cricket? ...


Baby Quail!
We are now raising ten baby quail for at least the next few months; Nine of them are Cotournix quail and one is "Texas A&M" which just means it's a white cotournix. They're so tiny and quiet it's amazing! The smallest one is literally no bigger than a baby mouse and they're all surprisingly calm and fascinating to watch.
Having ground-dwelling chicks is taking some getting used to. They don't like to be picked up from above and they certainly don't perch. They seem irritated when you make them perch, in fact! They prefer to be on solid ground which means no picking up and carrying around, but if you set your hand in their cage they'll let you "hang out" with them... Hopefully I'll have at least one suitable mating pair so I can hatch my own little quaillettes in the future. These little guys will provide eggs and meat for us, as well as some interesting conversation topics. Their housing has to be fairly special - draft free (to prevent quail piles... piles of quail in which they often kill each other), low ceilings (to prevent them from flying up, hitting the ceilings and breaking their necks) and very tiny mesh cage wire (these guys are so tiny they can fit through 1'x1 wire mesh... chicken wire even!)
It's amazing. These little fluffers only incubate for 17 days! In fact, within 5 weeks they start laying the next brood, and at the same time they reach "market weight" which is literally only a few ounces. :) Plus, mature quail only really need 1-2' sq feet per bird once they're mature. Mwahaha. I am Quail Girl!
Monday, May 30, 2011
Tanglewood's First Farm Party
 The weekend kicked off with an amazing gathering of friends and students out at our homestead/farm. We called it the Tanglewood Detangling Party. Folks showed up with gloves, shears, loppers and serious work ethic. I didn't get a single photograph of the detangling crew in action, but we had no less than ten people working down in the orchard to clear away the invasive vines that have been choking the geriatric apple trees. Before our party, each tree was skirted by 10-20 feet of multiflora rose vines, virginia creeper, grape vines, poison ivy vines, box elder trees and more. The poor trees were literally being drawn and quartered by the various vines!
I can't begin to explain how grateful I am for the wonderful people that came to help, Saturday. There was so much accomplished in such little time! All of the brush and vines removed were dragged to line the fence along the edge of the property. Hopefully this will help deter the deer this fall, especially since the one spot with the most brush is also the spot they cross most commonly into the orchard to nibble on the trees as well as my raspberry patch.

 While the majority of friends and students worked down in the orchard, I had a small ground of younger students (some as young as 8!) that came to help too! Of course I couldn't have them up to their knees in poison ivy and nettles so I found various other jobs for them including planting out over 150 lettuce seedlings! One of the lettuce varieties, Forellenschluss (an Austrian variety) was particularly fun to teach them to pronounce.
It was awesome to see them daintily plucking the seedlings up and planting them. I taught them each how to measure planting distances with their hands and they made very quick work of it. They also planted all of my marigolds and calendula out in the north garden and weeded some of the raised beds.
I think my favorite moment with the younger students was when I told them yes they could go in and see my antique taxidermy/skull collection. I'm not sure any of these kids had ever seen taxidermy in real life before. Their faces were priceless. One little girl in particular has become fascinated by skulls lately and we had a chat about how it's fairly socially unacceptable to go around saying "I like dead things"... hahaha.

 The evening came to a close with a fantastic feast of homemade pizza (with asparagus, oyster mushrooms and pesto), fresh rhubarb lemonade (the best ever), salad with maple/balsamic dressing and various other potlucked pasta salads, brownies, cupcakes... it was amazing!
I'll try to post some more about the various foods/recipes soon.
Folks wandered in and out all day, and when the food was ready we all gathered up by the house to eat. The weather held out until most of the people had tapered off in the evening, and then it began to sprinkle. At the very end of the night we were left with my three closest friends, chatting in the living room about horse-related nonsense. It was the perfect end to a perfect day.
Sunday, May 29, 2011
Tanglewood Detangled
So it's nearly 2 AM and I need to get to bed, but I wanted to post quickly to show you what we've been up to this weekend. Yesterday we had a whole slew of friends and students come to our homestead/farm to help us pull out the terrible mess of invasive vines and plants that have been choking the antique orchard we live next to. It was a huge success! I'll be posting additionally about this, but I wanted to just put up a few photos really quickly before bed.
The first is a photo from last fall to show you what the orchard used to look like.


The first is a photo from last fall to show you what the orchard used to look like.
The rest are photos of the orchard after yesterday, as well as a quick snapshot of just part of the brush pile that was formed along the edge of the property-line fence. This brush will help keep the deer out as well!

Sunday, May 22, 2011
Tea for the Tillerwoman
 Ahh. At last I can relax. My darling tiller (who still has no name. I should remedy that!) broke down this week. Of course, there were two days of sun forecasted before literally ten days of rain and rain and rain, and it broke down on Friday leaving me a ticking clock of anxiety. Each hour was an hour I was losing, and the danged North Garden (50'x30) needed to be tilled asap for planting.
 So... I opened her up. At first I was super excited because after a quick examination I was able to find the problem. The forward drive belt had slipped off of it's pulley (I have forward and reverse on this baby!) so it wasn't a huge deal. I slipped the drive belt back into place, revved up the engine and got it to till another three feet before it slipped again. Poo.
Upon closer inspection, I discovered the drive belt was split. No problem, right? I thought I'd just be able to head to the store and pick one up. Wrong! This particular model is so adorably ancient and geriatric that it uses an itty bitty non-standard belt. I was able to find one on ebay and ordered it immediately, but unfortunately the store I bought it from is closed on the weekends so it won't ship until Monday. I seriously started panicking. Monday is when the slew of 80% chance of rainy days began.
Then, yesterday morning, in a fit of madness, I started calling local small engine repair shops. My tiller is so old that there isn't even a model number on this guy. I think it's actually the first model of Junior Troy Bilt there was. I described the belt to a few different mechanics and they all said it was too small and they didn't have GW-9095 in stock (the part number). Finally I called a place that ended up being very close to us and the guy said he thought he'd have something that would work. I drove into town and TADA! He had a drive belt!
So yesterday evening was spent alternating between cooking carnitas for some friends and tilling patches of the North Garden. By 7 oclock I had finished not only the best carnitas I'd ever eaten (recipe to follow!) but I'd finished a final pass of the garden and wrapped up my tilling for the night.
Lucky for me, the forecast has shifted and we have sun and 80's today so I get to do another few passes with the tiller before the rain sets in. Thanks Michigan!
Saturday, May 14, 2011
Chicken Coop 1.0
Until now, our chick(en)s have been living inside a small cage on our enclosed front porch. They spend their nights in there and their days in their run outside and it has worked surprisingly well, but for the clean up. Chickens scratch. Ducks dabble. I guess all poultry have their "thing"... and scratching chickens makes for a very littered porch!

So this week I decided it was time for them to move to the barn. Of course then I got slammed with flumageddon so it didn't happen as soon as I wanted, but today I finally finished the indoor chicken coop, but for the hinges on the door (which are currently in the trunk of our station wagon, a couple of towns over... boo).This will look a lot nicer when (if) I get around to white washing the interior of the barn this summer. Please excuse the mess, as well. I tend to keep my barn tidier than my house, usually... I put the pallet in there for the chickens to roost on for now. I'll be building perches (as well as another little project I intend to reveal in the next couple of weeks) just as soon as I get around to it. That little chicken-sized door is the door that Gertrude (my ~80 pound ewe) leaped straight through the other day. What a weirdo.

This is a shot of what will be the outdoor chicken run. It looks pretty ridiculous right now (and will probably continue to do so, honestly) but it'll work! I'll be putting in a door at the close end, and then screening the whole thing with deer netting and zip ties. These little pvc-pipe enclosures work well, and we've had our one for the ducks for over two years now with little wear. This run will be the more "permanent" run for the meat birds. It'll house the birds that have little interest in hunting/foraging. I have another run that I'll be putting on wheels that I'll move around for the egg ladies.
Do you have any improvised livestock runs or pens? How did you build yours?

So this week I decided it was time for them to move to the barn. Of course then I got slammed with flumageddon so it didn't happen as soon as I wanted, but today I finally finished the indoor chicken coop, but for the hinges on the door (which are currently in the trunk of our station wagon, a couple of towns over... boo).This will look a lot nicer when (if) I get around to white washing the interior of the barn this summer. Please excuse the mess, as well. I tend to keep my barn tidier than my house, usually... I put the pallet in there for the chickens to roost on for now. I'll be building perches (as well as another little project I intend to reveal in the next couple of weeks) just as soon as I get around to it. That little chicken-sized door is the door that Gertrude (my ~80 pound ewe) leaped straight through the other day. What a weirdo.

Do you have any improvised livestock runs or pens? How did you build yours?
Saturday, April 23, 2011
We survived Earth Day 2011!
 Yesterday we spent the entire day using as little electricity as possible. This is difficult when you live in an old historical stone house with few windows, and especially difficult if you an artist like my husband. Poor Jeremy spent the day following the best spots of light around the house with his latest page of comic book art, sketching here and there and being a general good sport of it. The morning brought about an amazing reintroduction for me... Gardening books! Sure, I borrow the occasional library book, but it had been so long since I'd sat down with a stack of gardening books to research something in particular. Yesterday's topic? Potatoes. I read about how the Shakers grow theirs, how the English Victorians grew theirs, how they're conventionally grown and how best to grow them organically. What an adventure!
 After breakfast, I sat on the front porch sorting, cutting and prepping seed potatoes for planting. This is our first year planting potatoes, so hopefully this goes well. We'll be doing ours in straw and trenches.
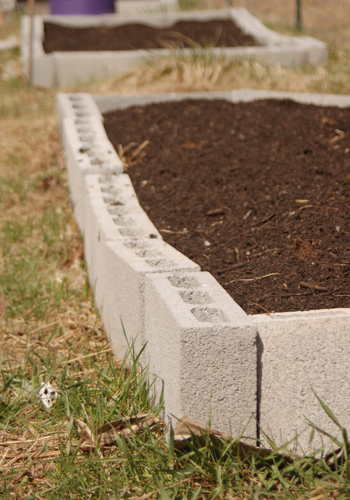
I spent the rest of my day outside in the rain. I laid out where our pumpkin mounds are going this year (marked by white plastic buckets in the photo below). I planted twenty-five 3 year old asparagus crowns and I dug four of the eight trenches for our potatoes (and those we're donating to Project Grow). I also mapped (and then re-mapped) out where we're going to plant our fruit trees. Unfortunately the best area is currently dominated by several huge multiflora rosa monsters. You know the type - the intimidatingly large flopping mounds of 1/2" thick vines covered in big nasty thorns. They look like skulking beasts just waiting for you to turn your back... *shudder*
 I may have a gathering some time soon where I invite our friends out with their loppers and trimmers and hedge cutters and chainsaws. We'll provide beer and potluck while they help us clean up all of the multiflora rosa thickets. You would not believe how overrun our poor antique orchard is by invasive plants. I was looking, the other day, at one of the geriatric apple trees and realized it has rose vines growing all the way up through its crown. That's at least 25 feet! I'm a fan of roses, and of rosehips of course (both for myself and the critters that eat them) but the trees are suffering greatly because of these beasts. I'll leave a few thickets around for the rabbits and voles to hide in, and I'll leave them along the fence because it deters the dogs' exploring, but other than that they have to go.
Anyway, by the evening we were totally bored. We realized too-late that our oil lamp wicks were both too short and we didn't have enough oil anyway, so we lit candles and ate sandwiches for dinner. After that we played scrabble, and I finished the game with six points less than Jeremy which is a serious improvement on my typical scrabble score...
I admit we did cheat a bit. Shortly after we'd been electricity free for 24 hours, Jeremy turned on his studio lamp and did some more work on his latest comic book page. Obviously I can't begrudge a man his job.
Sunday, April 3, 2011
Spring Peepers! (No, not chorus frogs!)
Look at what I brought home yesterday! I still haven't finished collecting "Okays" from neighbors, but if anybody strongly opposes these cute little ladies, I'll just send them off to live at our friends' poultry farm.
They were listed as "Araucana Pullets" but I'm really a purist when it comes to breeds, be it sheep, poultry or horses. These are not Araucanas, nor are they even Ameraucanas. They're just run-of-the-mill Easter Eggers... but dang they're cute! I was careful to get some in different colors so they wouldn't all look the same.

Some are chocolate colored,

some are "wild-type" marked like little chipmunks,

and one is even mouse-grey!
You'll be reading much more about these little ladies as they grow. I wasn't able to get many photos of them today because they're so itty bitty they start shivering as soon as I take them out of the brooder. They're only 3-4 days old! They've been started on 100% local and organic feed and will continue on this feed for the rest of their days.
I'll have to write a post later about our local feed mill and their wonderful efforts to buy local and organic components for their mixes. They're really great!
I'll have to write a post later about our local feed mill and their wonderful efforts to buy local and organic components for their mixes. They're really great!
Friday, April 1, 2011
The Milk Box
This past week has been full of silly little side projects as I prep for the warmer weather - it is going to get warmer, right? One of the biggest projects has been to clean up the yard. There were piles of wood chips from splitting logs to be picked up, gigantic tarps to be folded, random bits of garbage to be collected, mulch to be raked, straw to be piled... it was neverending. The biggest eyesore in my opinion was the large red cooler that we keep by our front gate for the milk man's deliveries. Ick. It's bright, it's plastic and it's just sitting there. It certainly doesn't feel like it belongs in my yard.


Earlier this year I had garbage picked some old pallets from an industrial complex, one of which was a beautifully aged oak pallet. I wish I had photographs of the before, because it certainly wasn't anything special to the average eye.
We had decided not to use the pallets for potato planters as originally planned because we don't know what they've come in contact with and I run a strict organic regimen around this place, so after dismantling it and leaving it in a pile all winter it was looking pretty junky itself. It was time for the pallet to be repurposed. Originally I had planned for the pallet to become part of the chicken coop, but the wood was so old and perfectly aged I didn't really want to waste it on poultry - though I'm sure they'd appreciate it's aesthetic value... Then I spotted it. I had the ugly cooler sitting less than ten feet from the pallet wood. It was like fate. Seriously.

It only took me about an hour and a half, to turn the ugly old pallet bits into a box to keep the ugly milk cooler in. The constructed box - crate? - is pictured below, and other than stenciling [or woodburning?] the word "MILK" on the front, I'm finished and happy with it.

---
Do you have any repurposed objects around your yard or house? Did you come up with the design yourself, or use a tutorial?
Thursday, March 31, 2011
A week gone? A horse gained?
Where did this week go? I knew it had been a few days since I had posted, but nearly a week?! I must've lost a few days in there somewhere. I don't post a lot about my horses and training here, but I figured I'd share this past week with anyone interested.
 This week has been chock full of hard labor and exhausted evenings. Saturday was the first horse show at Constantine Farms where I keep my lesson program and, as I'm the one running the shows this year, you can imagine I was pretty exhausted afterward. With the arrival of one of our trailered in horse-show participants came the arrival of my new-old project horse, Esme. She has been on pasture board at a friends' barn for the past year and a half and has had more than a year off of work due to her "special" tantrums.
Her special tantrums included some pretty intense rears and in running a horseback riding lesson program it's pretty important that your school horses don't scare kids away from the sport. I decided to try to sell her, and when that failed, I just let her sit up at the friends' farm with her buddies, eating high-quality hay, getting fat and enjoying life. Ah well.
This past month, however, I decided to give her another go. She's too fat to rear anyway, so my goal is to condition her to overcome (work through) her tantrums before she's lost enough weight to rear again. Haha. Sounds like crazy talk, I know, but so far so good!
I have had three successful rides on Esme at this point, and in each one I could feel her tense for a tantrum and then (like The Incredible Hulk trying to calm himself) think through things until she was calm again. Gosh I hope she keeps this up. She has some of the flashiest movement of any of my horses and I long to show her in dressage, but it's really her call when it comes down to it.
When I had her working in lessons a few years ago she was really a nice horse. She was sweet, attentive and only a little speedy. She jumped, was working on second level movements in dressage... essentially she was a great little pony, but I always felt like there was a connection missing that I had with my other horses. She rarely looked to me for guidance, and in a pinch she always resorted to her own means of navigating problems. If you're riding a horse and it makes it's own decisions in a tight spot, you may as well be riding a runaway train. They're living creatures which is part of what makes the sport so fun, but it's also what makes it so challenging and dangerous. If Esme would just admit that maaaaaaybe the humans are onto something and maaaaaaybe she should try looking to them for guidance when she's nervous, she would be a fantastic riding horse. I've seen glimpses of that attitude this week, so my hopes are high.
Wish me luck!
 This week has been chock full of hard labor and exhausted evenings. Saturday was the first horse show at Constantine Farms where I keep my lesson program and, as I'm the one running the shows this year, you can imagine I was pretty exhausted afterward. With the arrival of one of our trailered in horse-show participants came the arrival of my new-old project horse, Esme. She has been on pasture board at a friends' barn for the past year and a half and has had more than a year off of work due to her "special" tantrums.
Her special tantrums included some pretty intense rears and in running a horseback riding lesson program it's pretty important that your school horses don't scare kids away from the sport. I decided to try to sell her, and when that failed, I just let her sit up at the friends' farm with her buddies, eating high-quality hay, getting fat and enjoying life. Ah well.
This past month, however, I decided
 to give her another go. She's too fat to rear anyway, so my goal is to condition her to overcome (work through) her tantrums before she's lost enough weight to rear again. Haha. Sounds like crazy talk, I know, but so far so good!
I have had three successful rides on Esme at this point, and in each one I could feel her tense for a tantrum and then (like The Incredible Hulk trying to calm himself) think through things until she was calm again. Gosh I hope she keeps this up. She has some of the flashiest movement of any of my horses and I long to show her in dressage, but it's really her call when it comes down to it.
When I had her working in lessons a few years ago she was really a nice horse. She was sweet, attentive and only a little speedy. She jumped, was working on second level movements in dressage... essentially she was a great little pony,
 but I always felt like there was a connection missing that I had with my other horses. She rarely looked to me for guidance, and in a pinch she always resorted to her own means of navigating problems. If you're riding a horse and it makes it's own decisions in a tight spot, you may as well be riding a runaway train. They're living creatures which is part of what makes the sport so fun, but it's also what makes it so challenging and dangerous. If Esme would just admit that maaaaaaybe the humans are onto something and maaaaaaybe she should try looking to them for guidance when she's nervous, she would be a fantastic riding horse. I've seen glimpses of that attitude this week, so my hopes are high.
Wish me luck!
Monday, March 14, 2011
Chicken Planning - Breeds
If you've talked to me about chickens you know I'm pretty obsessed. After researching for weeks now, I can rattle of facts about heritage breeds like a pro but I still can't tell you which breeds I want to try! I keep narrowing it down to three breeds or so, and then I discover another one I like.
 My favorite for now is the Buckeye. Developed by Nettie Metcalf in the late 19th century, it is the only APA recognized breed to be developed exclusively by a female. Unfortunately it was being developed simultaneously with the Rhode Island Red, and which of the two birds have you heard of? Exactly. The Buckeye is a dual purpose chicken that isn't a spectacular layer or meat bird, but is good for both, and everything that I've read says their personality and mousing ability makes up for that. Yes, I said mousing ability. These birds are known for catching and eating mice!

Another breed I'm determined to try is the Wyandotte. They're another dual purpose heritage breed and they come in so many color varieties it makes my head spin! I was set on the blue-laced-red wyandottes, but they are proving difficult to obtain, so now I'm considering the blue wyandottes which are a beautiful dark slate grey color.
 The last breed I'm pretty sure I'm set on is the Buff Cornish. I want to have chickens for meat, and while I really would like to raise dual purpose heritage birds, I'd also like to have meat before Christmas, haha. The Buff Cornish is a heritage meat breed, derived from the Dark Cornish, which is the ancestor of the modern Cornish X meat birds that everybody grows. The Buff Cornish is pretty much the same as the Dark Cornish, they're just a prettier color.
Those are the three I'm set on, as of this morning. Give me two hours and I'll be all over the place again. Also, I have two mature Black Marans hens reserved at a local farm to provide quick eggs for us this spring.
Some of the other breeds I have considered are: Speckled Sussex, Ameraucana, Dorket, Brahma and even Welsummer. They all have their perks. I'll have to keep you all posted about my final decisions.
I've been putting off getting chicks so far since Jeremy and I are heading out to a couple comic book conventions and we don't want to have little chicks for our farm-sitters to have to worry about in addition to ducks, dogs, cat and sheep.
--
Do you raise chickens for meat and eggs? Are they heritage breed, or more conventional, modern breeds?
 My favorite for now is the Buckeye. Developed by Nettie Metcalf in the late 19th century, it is the only APA recognized breed to be developed exclusively by a female. Unfortunately it was being developed simultaneously with the Rhode Island Red, and which of the two birds have you heard of? Exactly. The Buckeye is a dual purpose chicken that isn't a spectacular layer or meat bird, but is good for both, and everything that I've read says their personality and mousing ability makes up for that. Yes, I said mousing ability. These birds are known for catching and eating mice!
Another breed I'm determined to try is the Wyandotte. They're another dual purpose heritage breed and they come in so many color varieties it makes my head spin! I was set on the blue-laced-red wyandottes, but they are proving difficult to obtain, so now I'm considering the blue wyandottes which are a beautiful dark slate grey color.
 The last breed I'm pretty sure I'm set on is the Buff Cornish. I want to have chickens for meat, and while I really would like to raise dual purpose heritage birds, I'd also like to have meat before Christmas, haha. The Buff Cornish is a heritage meat breed, derived from the Dark Cornish, which is the ancestor of the modern Cornish X meat birds that everybody grows. The Buff Cornish is pretty much the same as the Dark Cornish, they're just a prettier color.
Those are the three I'm set on, as of this morning. Give me two hours and I'll be all over the place again. Also, I have two mature Black Marans hens reserved at a local farm to provide quick eggs for us this spring.
Some of the other breeds I have considered are: Speckled Sussex, Ameraucana, Dorket, Brahma and even Welsummer. They all have their perks. I'll have to keep you all posted about my final decisions.
I've been putting off getting chicks so far since Jeremy and I are heading out to a couple comic book conventions and we don't want to have little chicks for our farm-sitters to have to worry about in addition to ducks, dogs, cat and sheep.
--
Do you raise chickens for meat and eggs? Are they heritage breed, or more conventional, modern breeds?
Saturday, March 12, 2011
Asking Readers' Advice - Fixing the Barn
This is just a quick call for tips, experience, advice, accounts, etc...
 This photo was taken from a neighboring tree and shows a bit of the roof.
I'm considering painting the corrugated metal roof on the barn. It is rust-colored, but other than one panel that seems older than the rest, it is definitely just surface rust. I want to basically do upkeep on this barn to keep it from deteriorating any further at least while we're living here, which I expect will be 5-10 years. Does anyone have experience painting corrugated metal?
Any ideas on what color I should paint it? Black would be nice and conservative, but wouldn't it also attract heat and make the barn hotter in the summer? Hmm...
I'm also planning to reinforce the leaning area of foundation with rebar this spring once the ground thaws. Any tips there?
 This photo was taken from a neighboring tree and shows a bit of the roof.
I'm considering painting the corrugated metal roof on the barn. It is rust-colored, but other than one panel that seems older than the rest, it is definitely just surface rust. I want to basically do upkeep on this barn to keep it from deteriorating any further at least while we're living here, which I expect will be 5-10 years. Does anyone have experience painting corrugated metal?
Any ideas on what color I should paint it? Black would be nice and conservative, but wouldn't it also attract heat and make the barn hotter in the summer? Hmm...
I'm also planning to reinforce the leaning area of foundation with rebar this spring once the ground thaws. Any tips there?
Friday, March 11, 2011
Not Dabbling in Normal

Hey Guys! Guess what!
I've been asked to begin blogging over at Not Dabbling in Normal and will be posting there every Friday!
Okay, sorry. I'm geeked.
Be sure to check out my first post this morning on my adventures in making granola.
This month the writers at Not Dabbling are participating in the real food challenge, and this is proving to be a great excuse for me to start eating more healthily and to start cooking and baking more.
Tuesday, March 1, 2011
Wooden Seed Flats
 I've been working on building nine wooden seed flats that fit snugly into my seed starting shelves. These will be perfect to use with soil blocks that I make with my soil blocker. I estimate these cost me roughly $20-25 dollars to make total, and after some irritating discoveries about the quality of big-box-store nails I've finally finished them!
 Now to start planting...
I'll try to post a tutorial for these if anyone is interested. They're made from a batch of locally milled cedar that was cut incorrectly and thus sold at a discount.
--
Do you start your own seeds? What do you start them in? Do you have any plastic free seed starting tips to share?
Subscribe to:
Posts (Atom)